Home Additions & Renovations: Take a Virtual Tour of Our Hedwig Village Project
As a residential building design firm, we often tackle interior design, major gut remodels, and new construction projects. Laura’s recently-completed Mountain Lane Show House in Aspen-Snowmass is a great example of a project that employed the firm’s renovation and interior design services. Mountain Lane perfectly embodies the versatility and multidisciplinary nature of our firm. In the case of our Hedwig Village project, however, our residential design team takes the spotlight focusing on all architectural aspects of the full-scale renovation — including conversions, additions and other structural remodeling. For this project we worked alongside interior designer Molly Solich Design and builder Cupic Custom Homes. Together, we made the process as seamless and stress-free as possible for our clients.
. A B O U T H E D W I G V I L L A G E .
Not too far from Downtown Houston, Hedwig Village is a quiet community with sprawling lots and tree-lined streets. Hedwig Village was incorporated in the 1950s, so many of its homes were built in the mid-century or before. Our clients’ Hedwig Village home was a 1920s ranch-style house that they loved but which did not quite meet their needs.
They adored the location. However, with a young family of five, fulfilling work lives and a busy social schedule, this house was just too small and outdated. Before our renovation, the home did not have enough bedrooms for the family, an appropriate mud room or a functional kitchen. It also lacked flow, which made entertaining difficult.
. G O A L S .
Our goals for this project were tripartite. First, we wanted to honor the history of the Hedwig Village neighborhood. We also wanted to preserve unique elements of this particular 1920s home while modernizing it. Second, we wanted to add an outdoor livable space. Third, we wanted to improve the flow of the property. We hoped to update the home’s layout, make outdoor spaces more functional and provide a seamless transition between the interior and exterior.
. P R O J E C T S C O P E .
Originally, the Hedwig Village homeowners had a limited scope. However, when LUDC Creative Director Gina Elkins walked the property, she gave them her dream scheme. The clients trusted Gina completely and our team ended up doing work on almost all aspects of the home.
We added a brand-new mudroom, upgraded the kitchen, completely re-envisioned the primary suite, and added three bedrooms with a second floor addition. The mudroom is off the kitchen, and now acts as the hub as the home — complete with lockers and a desk for the homeowners. To improve the property’s flow for entertaining, we added an outdoor loggia that includes an outdoor kitchen, pool wash room, and outdoor shower.
Follow below for a complete home tour of our Hedwig Village project. We hope it will provide a spark of inspiration for your own remodel or home addition!
. H E D W I G V I L L A G E H O M E T O U R .
Entrance
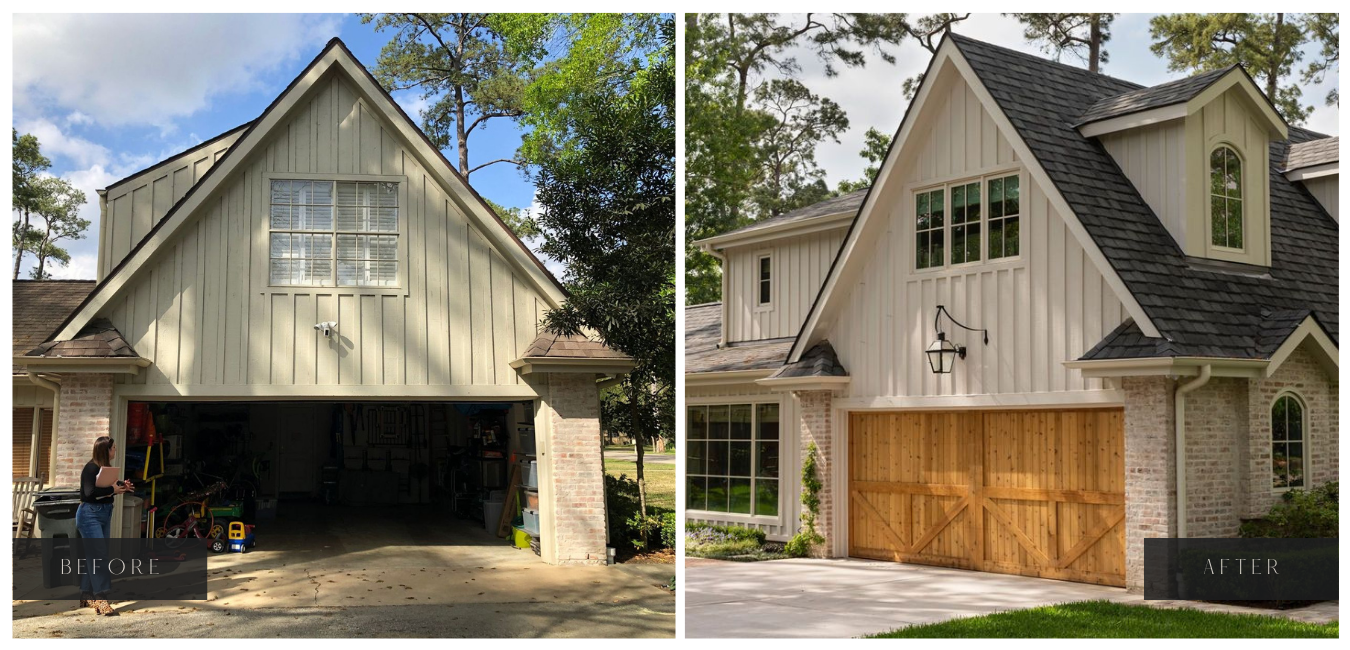
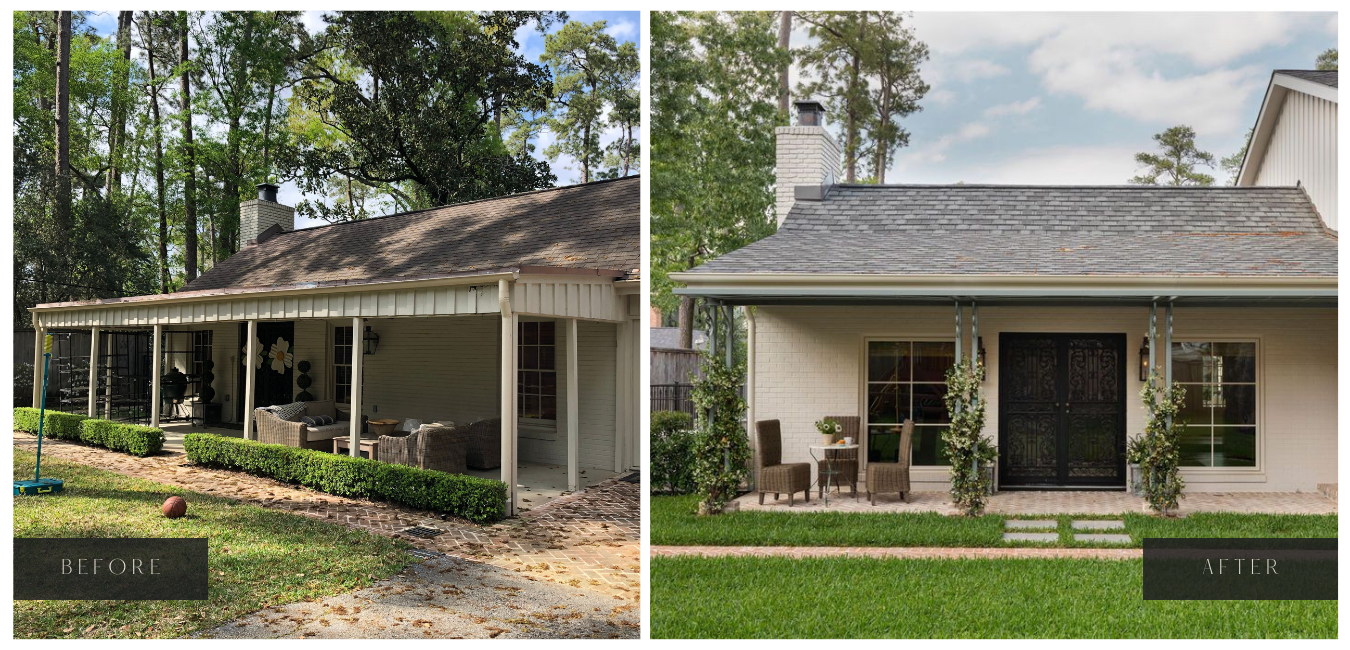
We begin our Hedwig Village home tour with the driveway and garage — both of which were overhauled by the Laura U Design Collective. Our team designed the garage door in-house and hand-selected the large-scale lantern — which matches lanterns in the backyard. We also added dormers, replaced the roof and designed a beautiful new driveway that blends well with the home’s exterior and gives the family more parking.
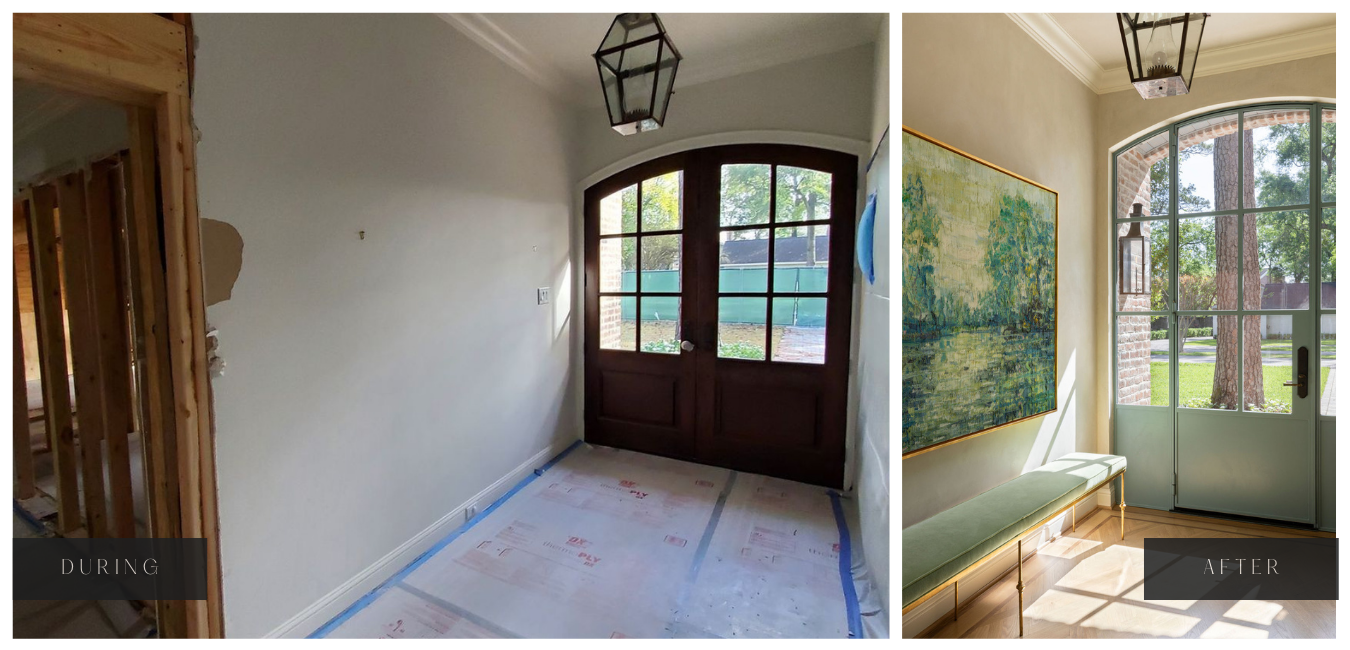
From the garage and driveway, we head into the home’s foyer. The original home’s front door was a double door made of dark wood and small windows. We wanted to bring more natural light into the entryway. To do so, we opted for a custom-designed steel door — which features larger windows and slim framing.
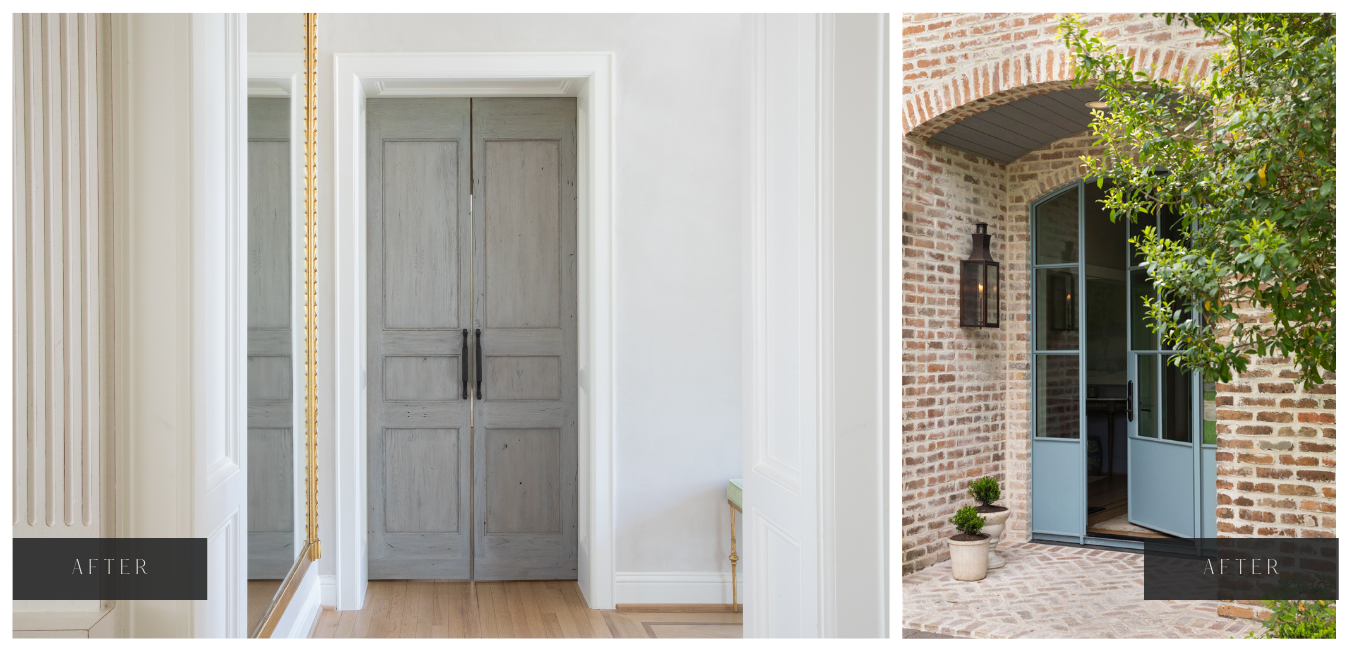
The beautiful blue paint finish complements the exterior shutters and interior color palette. We collaborated with Molly Solich Design on the light blue stain palette found throughout the home. The owner’s suite is just off the entry, so we installed architectural vintage doors to create private entry to owner’s suite.
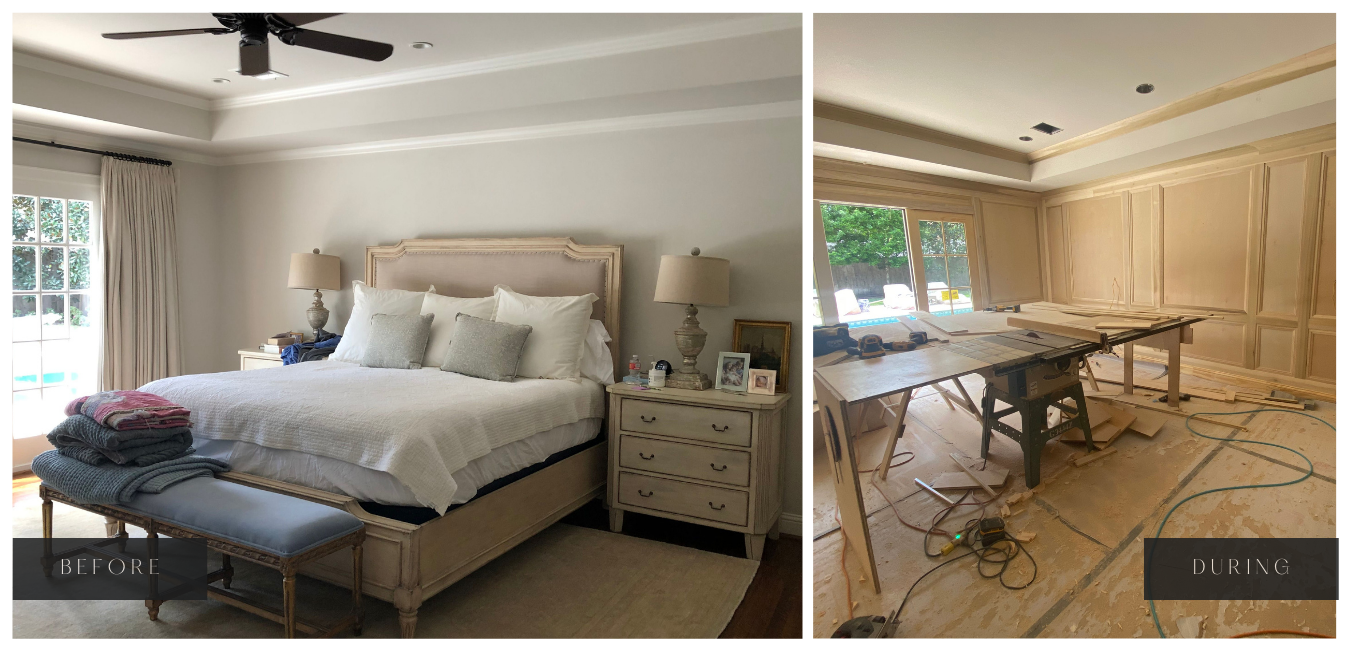
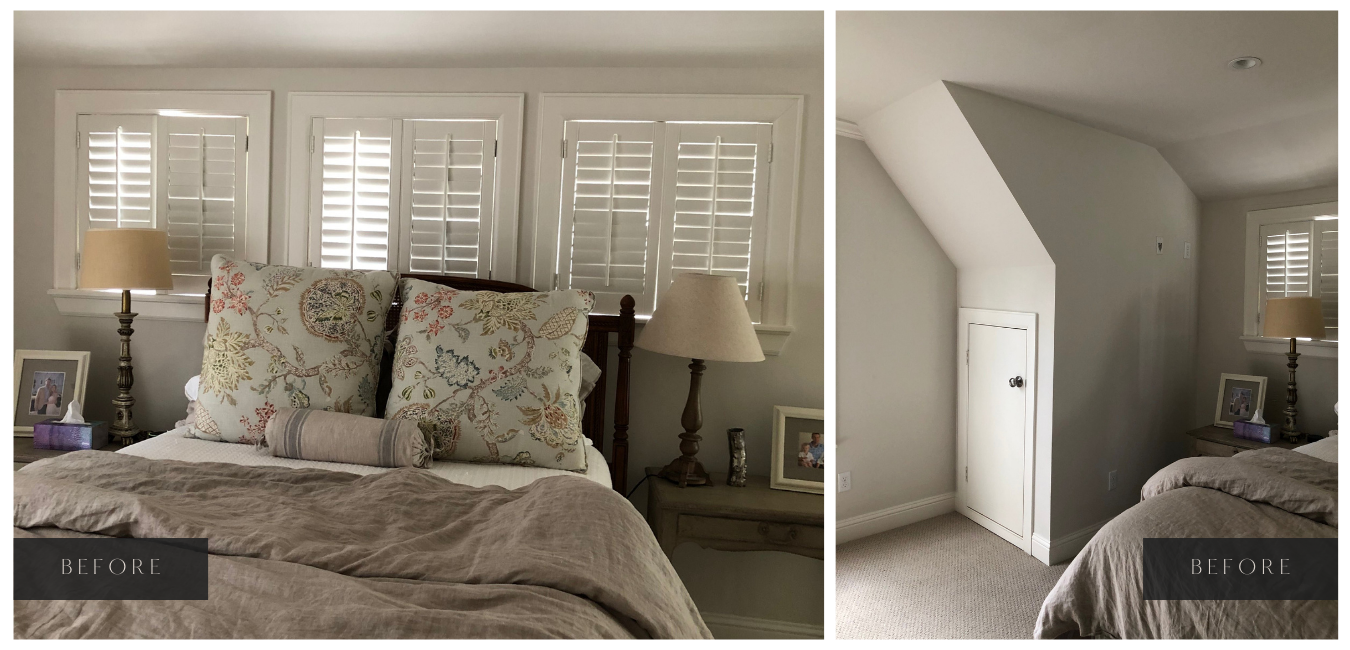
Primary Suite
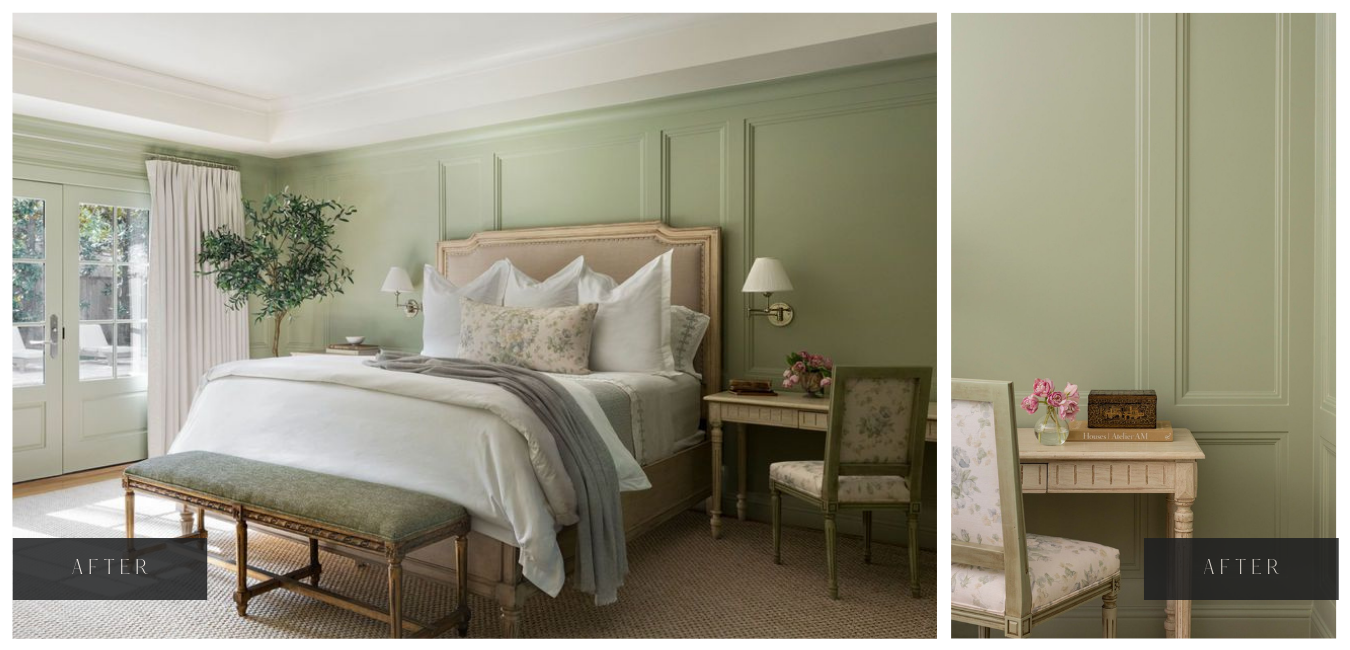
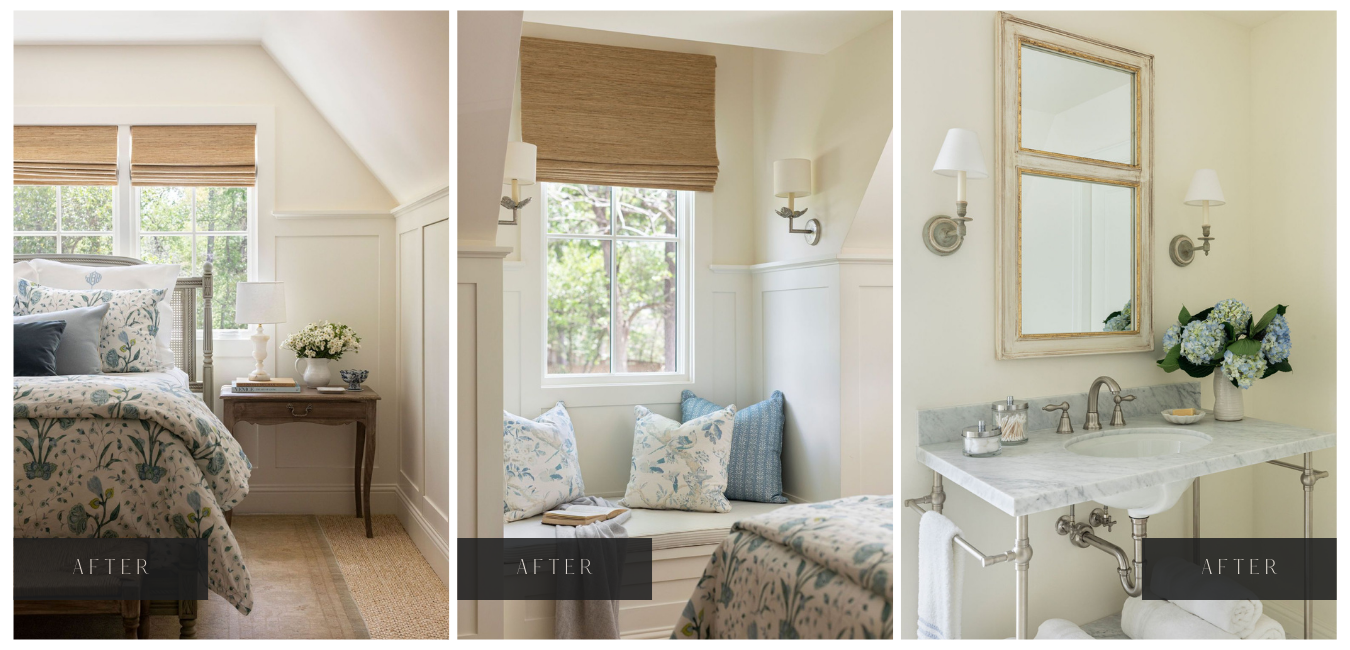
From the entryway, we proceed to the private quarters of the home. Originally, this wing of the home housed not only the primary suite, but two kids’ bedrooms as well. Through the renovation, we moved one of the kiddo’s bedrooms to the new addition upstairs – allowing us to convert the original square footage into a large closet and add a designated study for our clients. Initially, the primary bedroom had very little architectural character, so we designed all new paneling and molding. Because almost every wall has an opening – a door or window – drawing the millwork for the primary bedroom was a challenge. Our interior renovation designer based all millwork paneling design on the furniture selected by Molly Solich Design, as well as the windows and doors to ensure the space feels very cohesive. As you can see from the photos above, the paneling now aligns perfectly with the bedframe. Even the wall sconces were considered when designing the millwork.
As you can see from the photo above, we replaced the existing window and door unit. Our team worked with Marvin Windows to select a unit that blends in with the paneling on abutting walls and has a more streamlined grid and fewer lines. This modernizes the unit while preserving the home’s original character.
Primary Bath
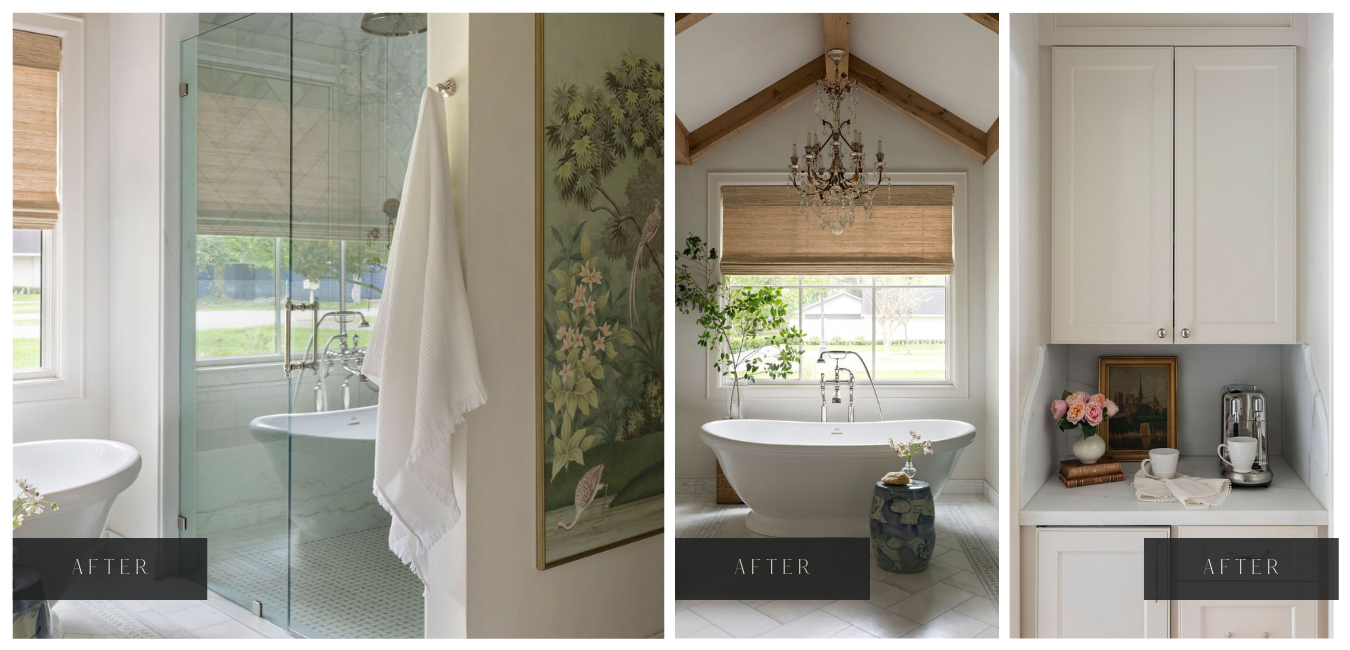
Between the bedroom and bathroom, we added a small vestibule (pictured above on the right) to create a certain degree of separation. The vestibule replaced the double door that separated the bath and bedroom previously. With the owner’s study just off the primary bath, a morning bar was the perfect inclusion for this vestibule. Our team designed this romantic millwork — including cove edging and the special French curve detail — so that our clients could enjoy a cup of their favorite brew without even leaving their room.
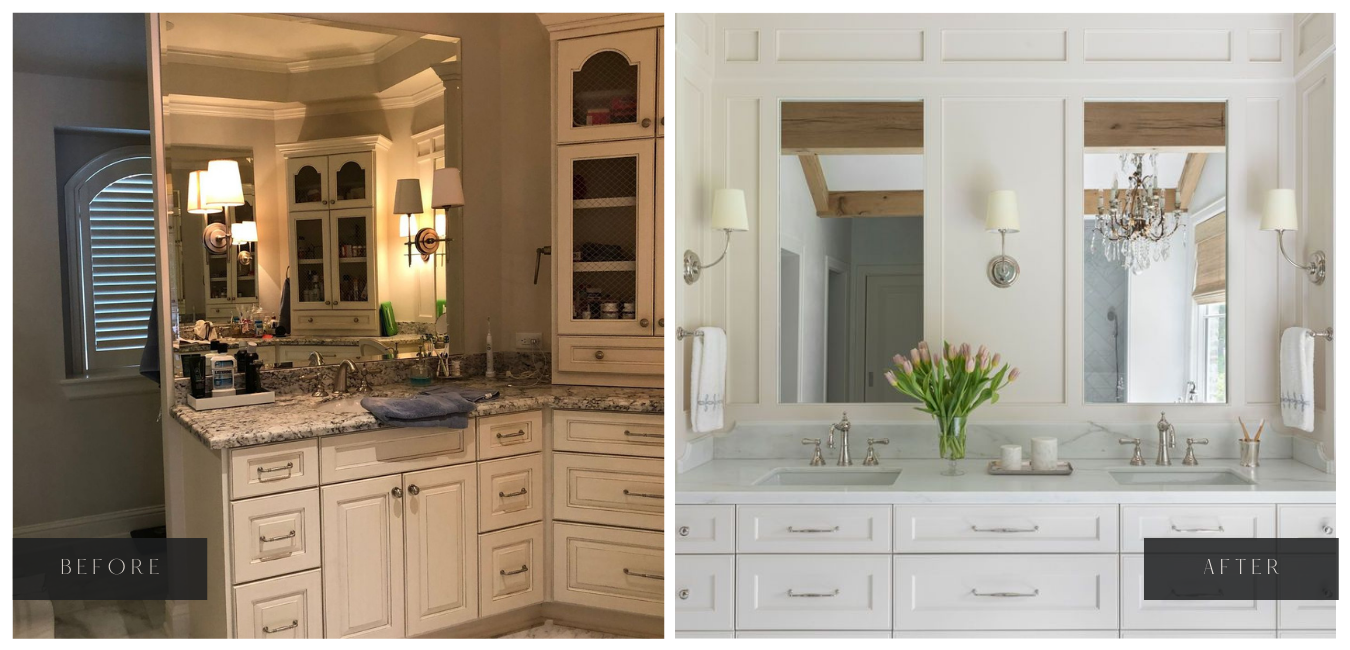
The original primary bath was dark and closed-off, so we demoed the entire space. We developed a new design that increased the shower size, vaulted the ceiling and added a huge window in front of the soaking tub. Our team worked with Cupic Custom Homes to develop a new roof that could accommodate the vaulted ceilings. Wooden beams that trace the vaulted ceiling add warmth to this otherwise cool-toned space.
Our interior renovation designer designed a new vanity and integrated wall paneling that ties this space to the primary bedroom. For perfect placement, we asked out clients to stand inside the sower so we could determine appropriate location and scale of the plumbing fixtures. While Molly Solich Design selected the tile for the primary bath, our team hand-laid it to capture the best design possible.
Primary Closet
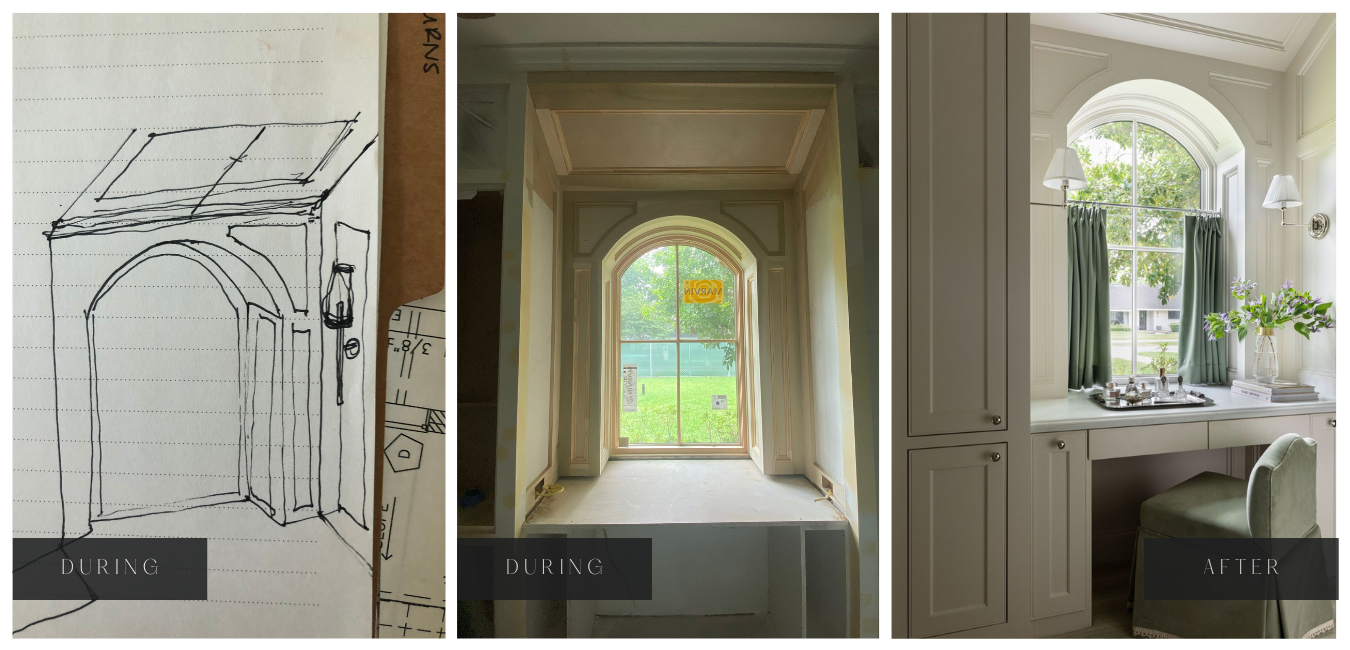
From the bathroom, we head into the primary closet, which was originally one of the kids’ bedrooms. The ceiling in this space is angled. However, we were still able to design a seated vanity with custom millwork that makes the arch and unusual incline feel intentional.
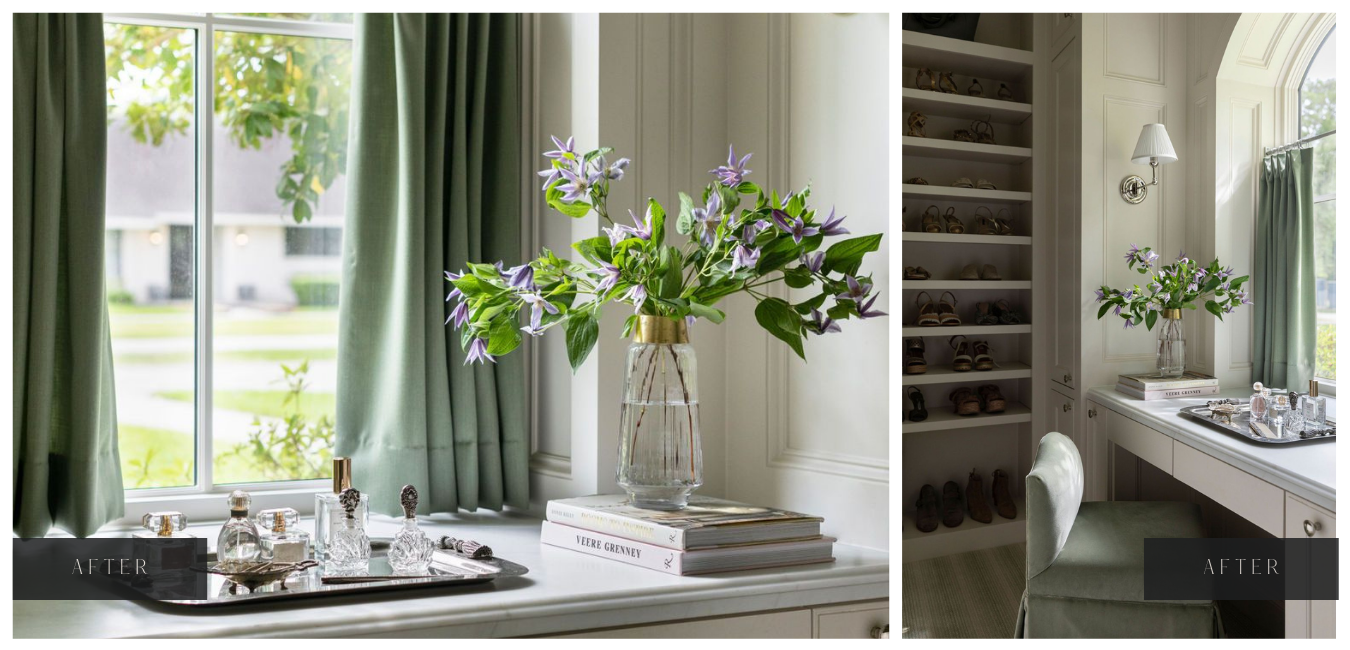
Our interior renovation designer also added a large island in the center of the room. This island provides lots of custom storage designed to house our clients’ jewelry and other items. For the shelving unit, we worked closely with the clients to ensure the storage met their needs. Lastly, we added a door to the connecting hallway, so there is easy circulation in and out of the closet without entering the primary bedroom.
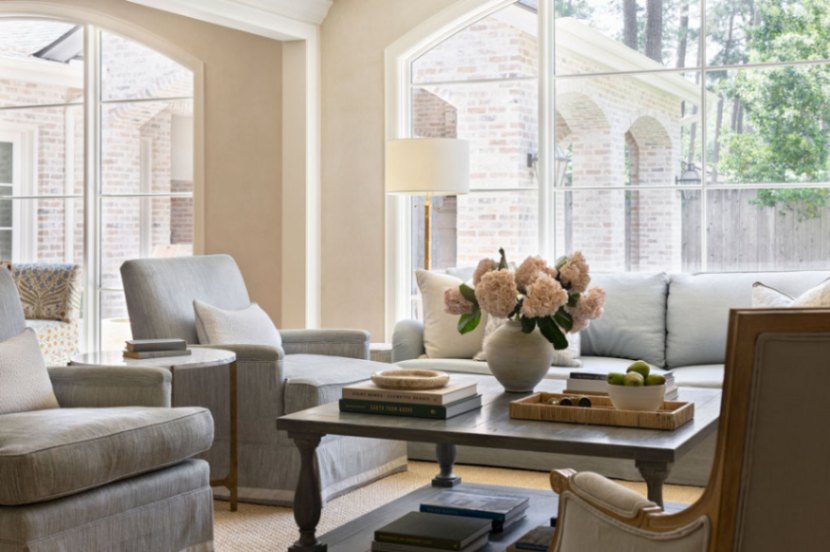
Breakfast Room and Living Room
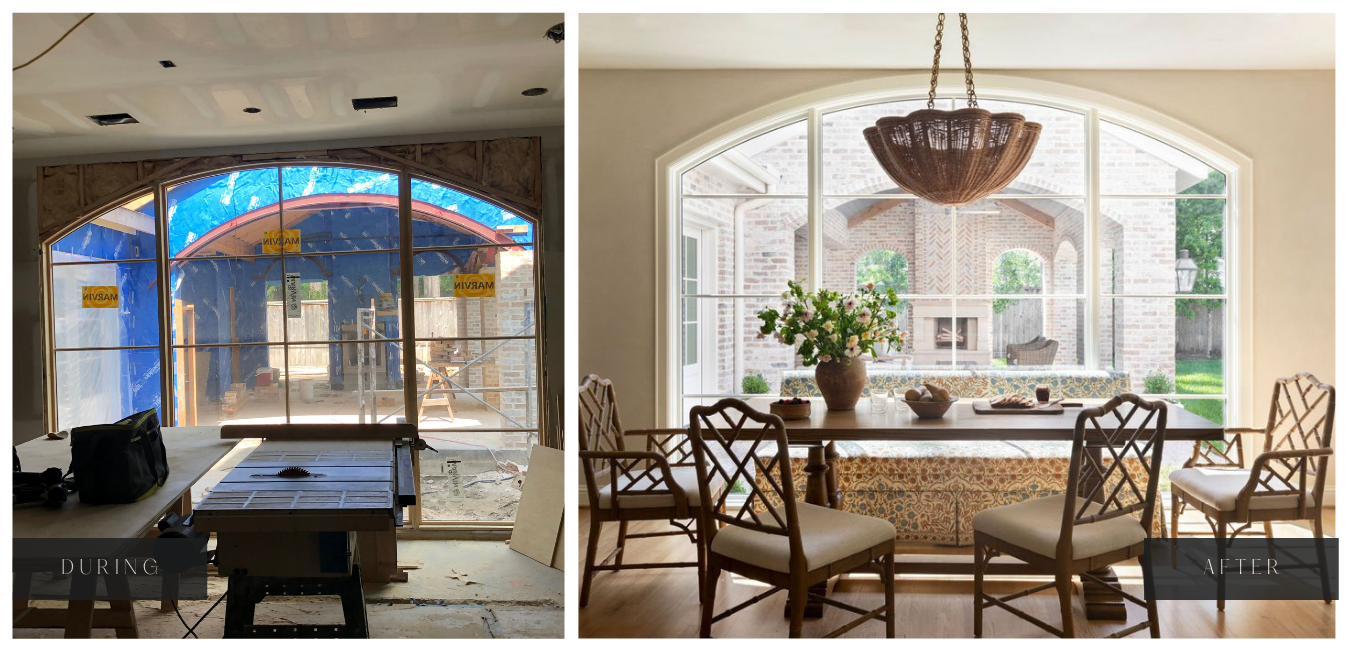
From the primary closet, we head out of the private wing of the home and into the breakfast and living room. Here, we expanded the floor plan by four feet so that the breakfast room wall aligns with the existing living room wall. We added arched windows that line up to match the arch in the new loggia and fall centerline with the kitchen.
We removed the existing double door that connected the breakfast nook to the patio and replaced it with a mammoth arched window. This arched window matches the window in the living room and allow for natural light to shine in.
Kitchen
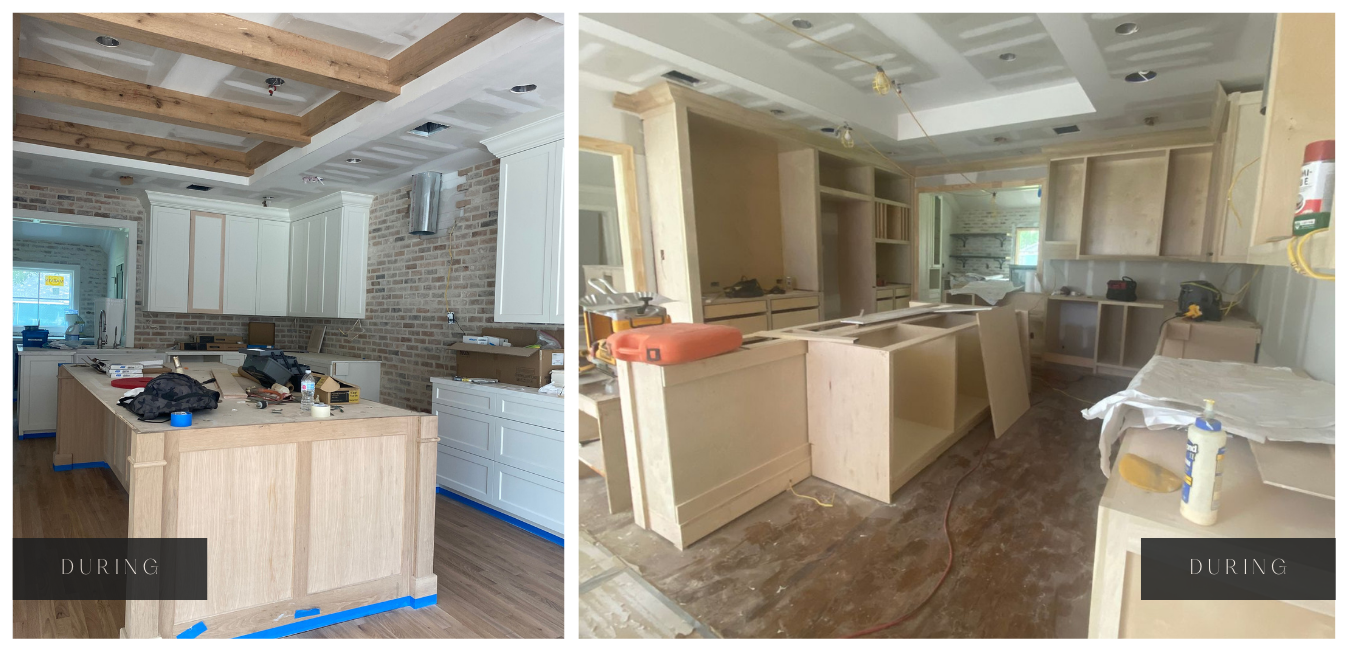
Few spaces in this home received as much attention as the kitchen. Originally, this space was small, cramped and unfunctional for a family of five. To remedy these concerns, our interior renovation designer redesigned the layout. We also expanded the case opening on both sides and popped the ceiling to add height. Like in the primary bath, we added oak beams to the kitchen ceiling for warmth, texture and dimension.
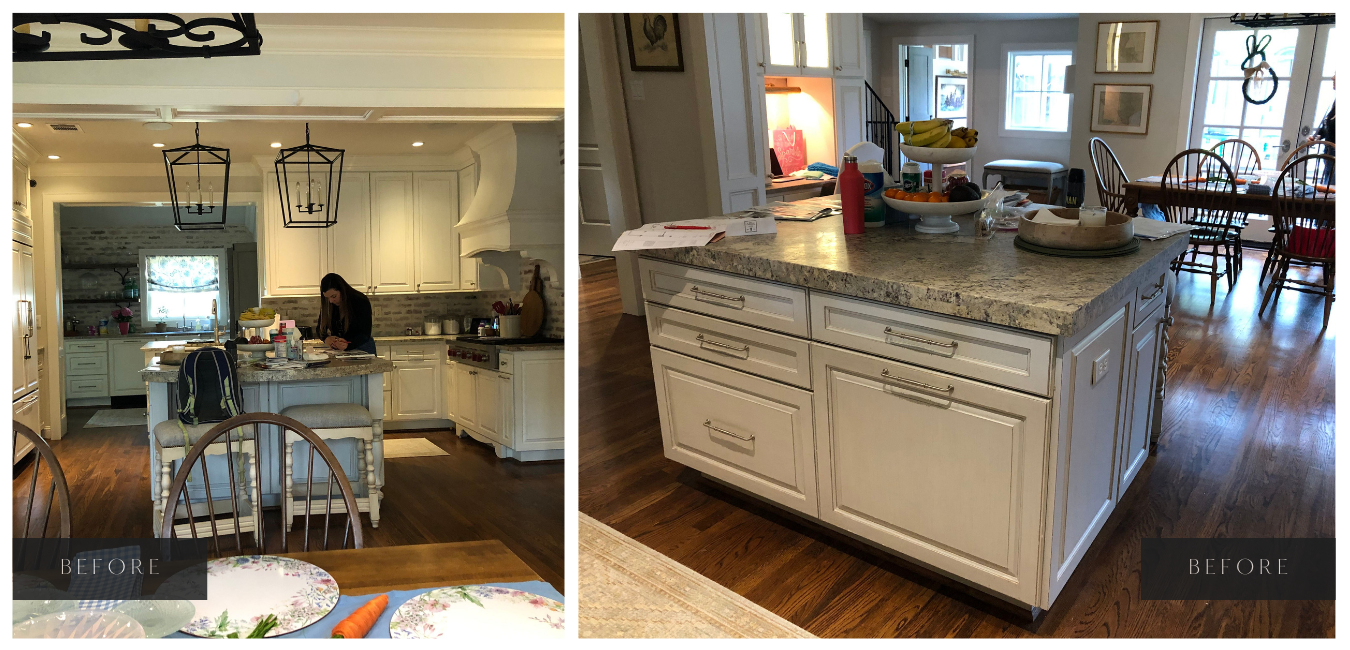
Our team also designed all the millwork — including the kitchen island. For the kitchen island, we wanted to create a piece that felt like furniture instead of another set of cabinets. To achieve this, we chose a different countertop profile and selected a seamless slab. We collaborated with a painter to create the island’s custom stain. The island also boasts under counter outlets, so the kiddos can plug in their iPads to do homework, while the homeowners cook.
We opted for a tall, vertically-oriented millwork design for the day pantry and fridge to help blend both with the cabinets. The day pantry allows our clients to hide small appliances like their toaster and coffee maker.
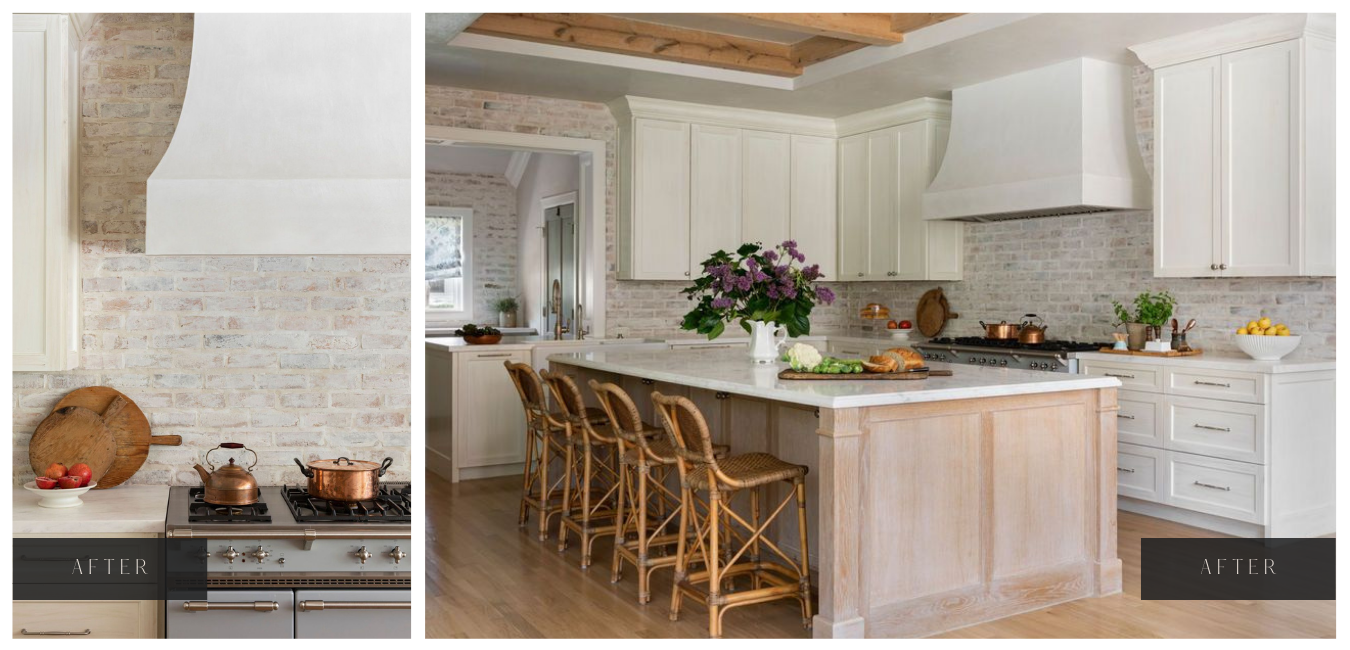
We added a new wall where the range is to allow for a larger stove and more counter space. For the finishing touches, we selected the vent hood’s plaster color. We also coated the brick backsplash with a light wash to replicate the home’s exterior and reinforce the connection from indoors to outdoors.
Hall Off the Kitchen
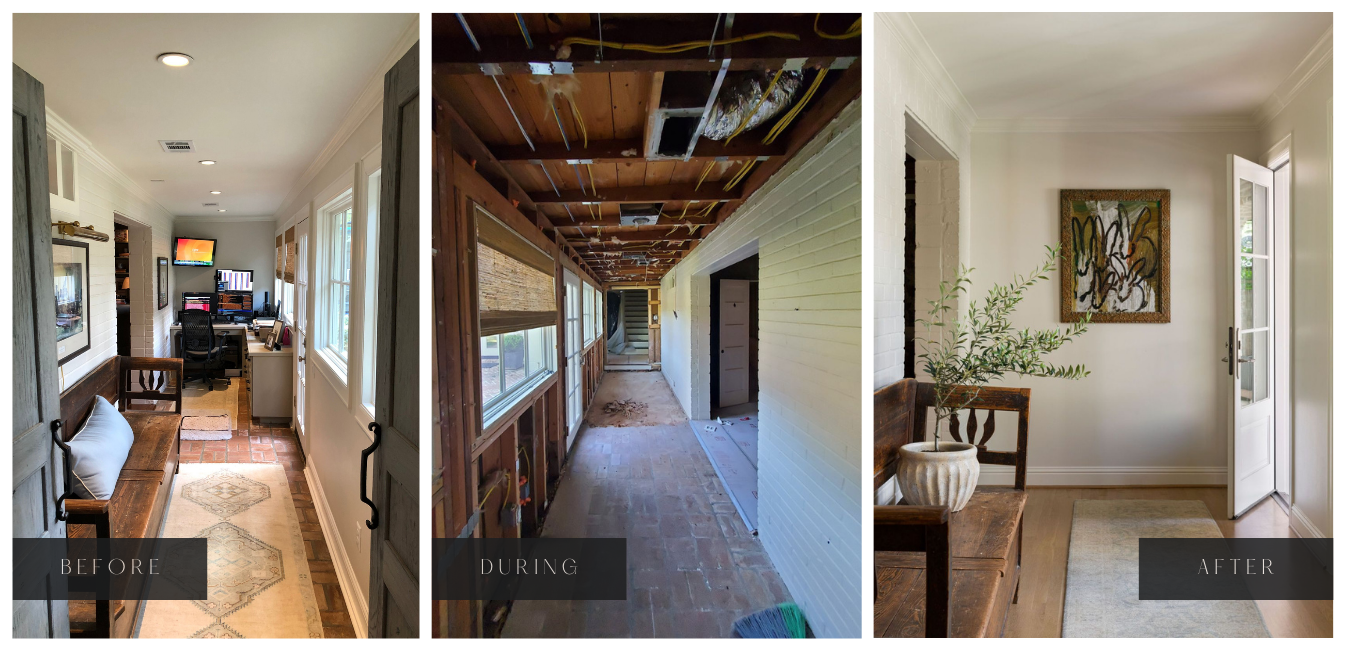
From the kitchen, we proceed into the hall. The original hallway was not built at the same level as the main house, requiring visitors to step down into the hall. We raised the floor level to match the main house and extended the hallway by two feet to improve circulation through the home. This also provides better connectivity to the hunting lodge, which is the next stop on our home tour!
Hunting Lodge and Bar With Updated Porch
Built in the 1920s, this hunting lodge is original to the home. We worked with the client’s to keep the space as original as possible to preserve the history.
Off the hunting lodge, our team did choose to rework the original porch, updating it with a new cover, trellis and brick pavers. The porch also connects to the playroom for easy access for the kiddos.
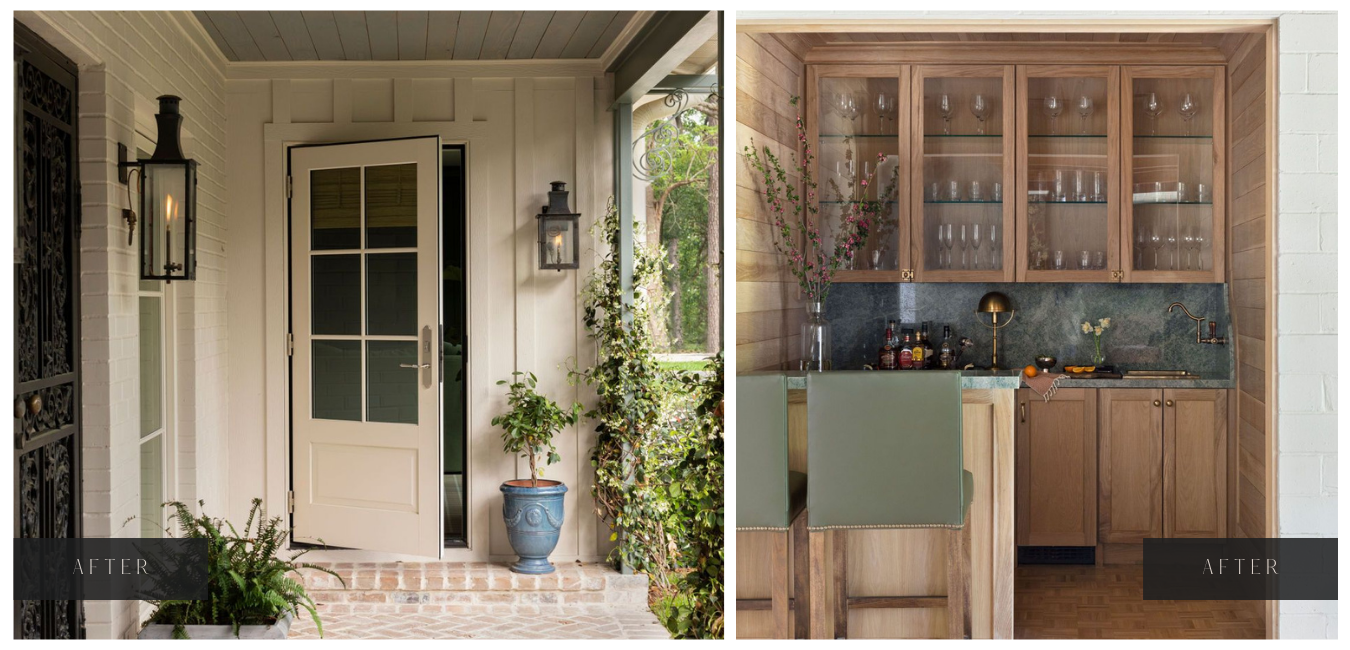
One of our favorite spaces in this home renovation is the bar we added to the Hunting Lodge (pictured above on the right). Our team chose penny gap planking in white oak wood. We also designed French curve millwork that resembles cabinetry from the vestibule in the primary suite. With refrigerator beverage drawers, a wine fridge, and plenty of glass storage, this is the perfect place to unwind and create cocktails for friends.
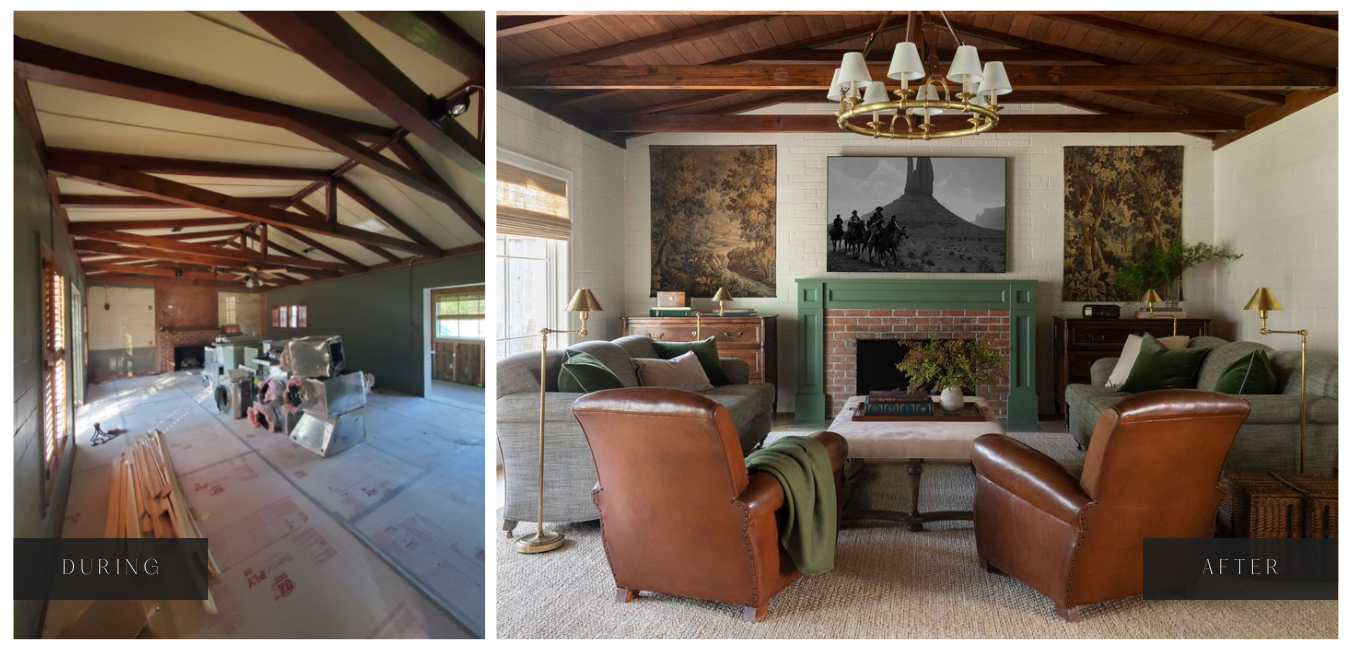
Because we wanted to preserve the lodge’s original character, we chose to keep the structure intact — retaining its beams and planking the ceiling to match the beams. We drew the fireplace mantel on-site — opting for a design that would feel quite at home in a house from the Arts-and-Crafts era. Initially quite dark, we added two new windows and centered the original doors for more natural light and a better flow.
With entertaining in mind, we head back through the hallway and outside to the new outdoor loggia – perfect for hosting and outdoor living.
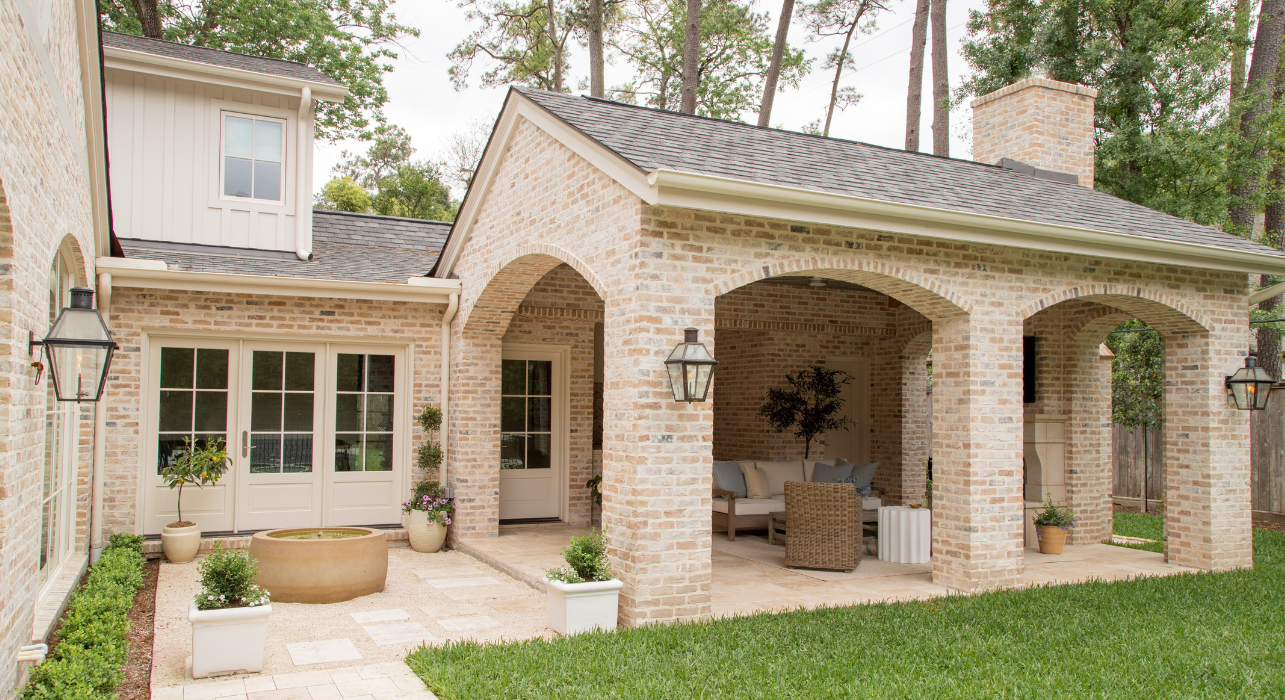
Loggia and Pool Bath
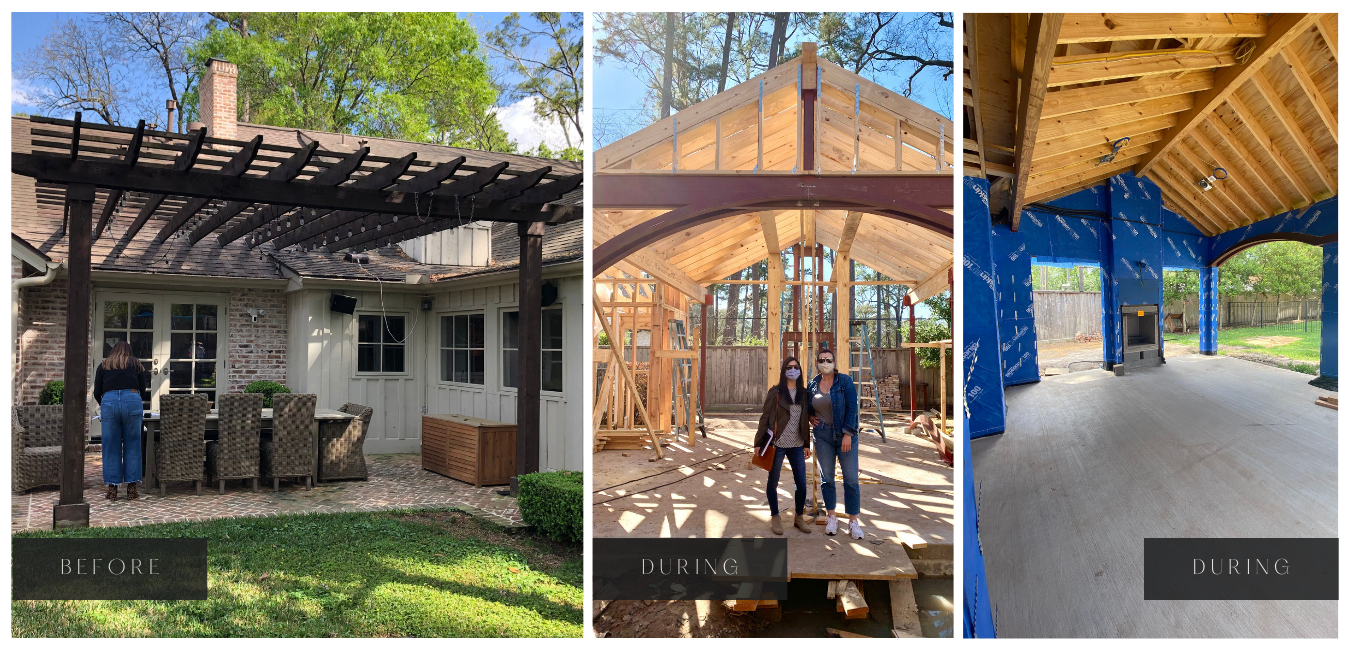
One primary goal of our renovation was to improve the transition from interior to exterior — creating more connectivity between the home and the outdoors. Originally, there was only one way to access the backyard from the house – through the breakfast nook doors.
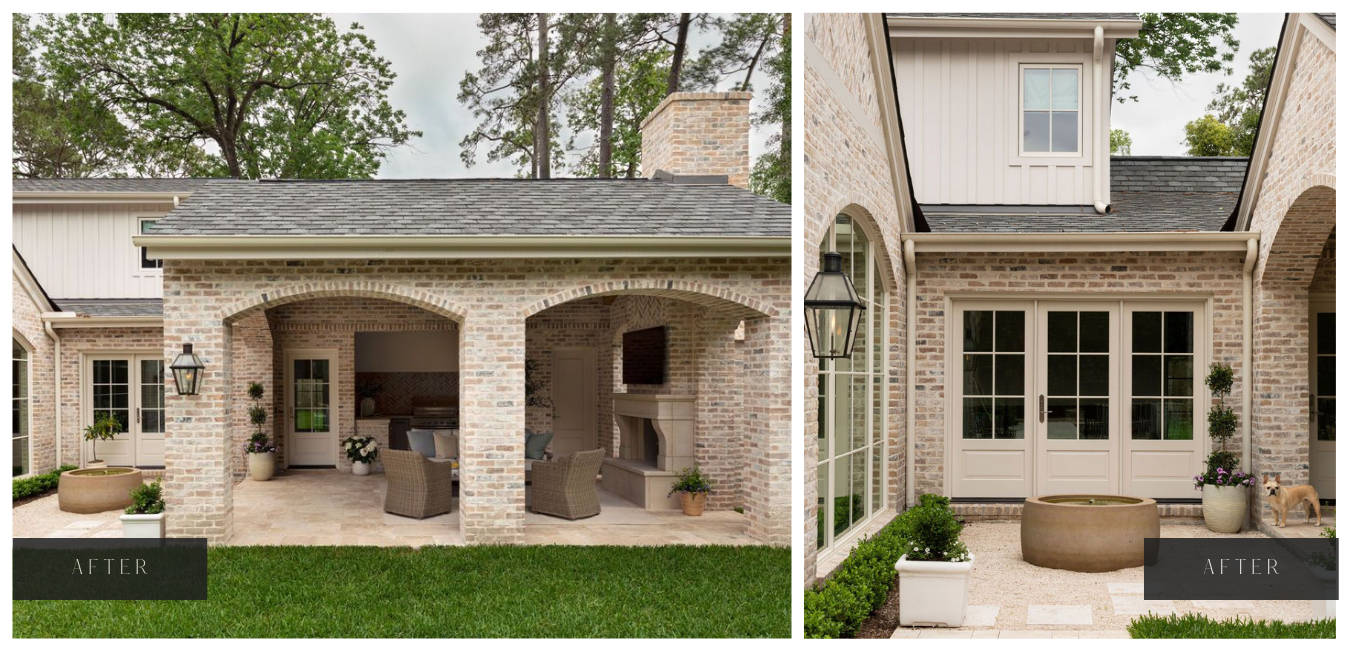
To improve flow, we added outdoor loggia (pictured above), which the clients use to host family and friends. The loggia creates a semi-indoor, semi-outdoor space that is perfect for bridging the gap between interior and exterior. With an outdoor kitchen, fireplace and plenty of seating, this space is ideal for entertaining.
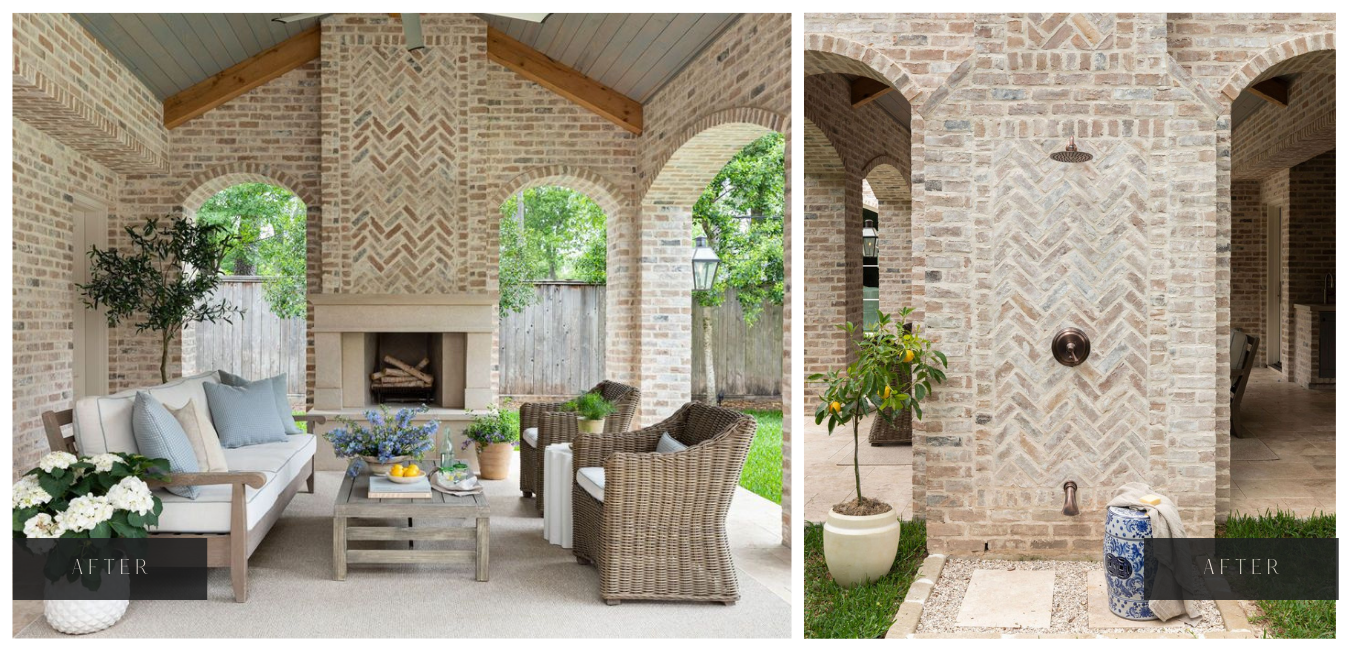
We matched the loggia beams to those within the home for even more continuity. The loggia’s arches are on centerline with the kitchen — an integral design choice. We also added gas lanterns and a sunken courtyard. Because the courtyard is sunken, we had to work with a civil engineer to ensure it drains properly.
Originally, the home did not have a separate pool bath. We integrated both an enclosed washroom and an outdoor shower adjoining the new loggia. This way, our clients can entertain outdoors with everything they need within reach. Plus, we’re avoiding wet footprints making their way inside!
Mudroom and Stair Nook
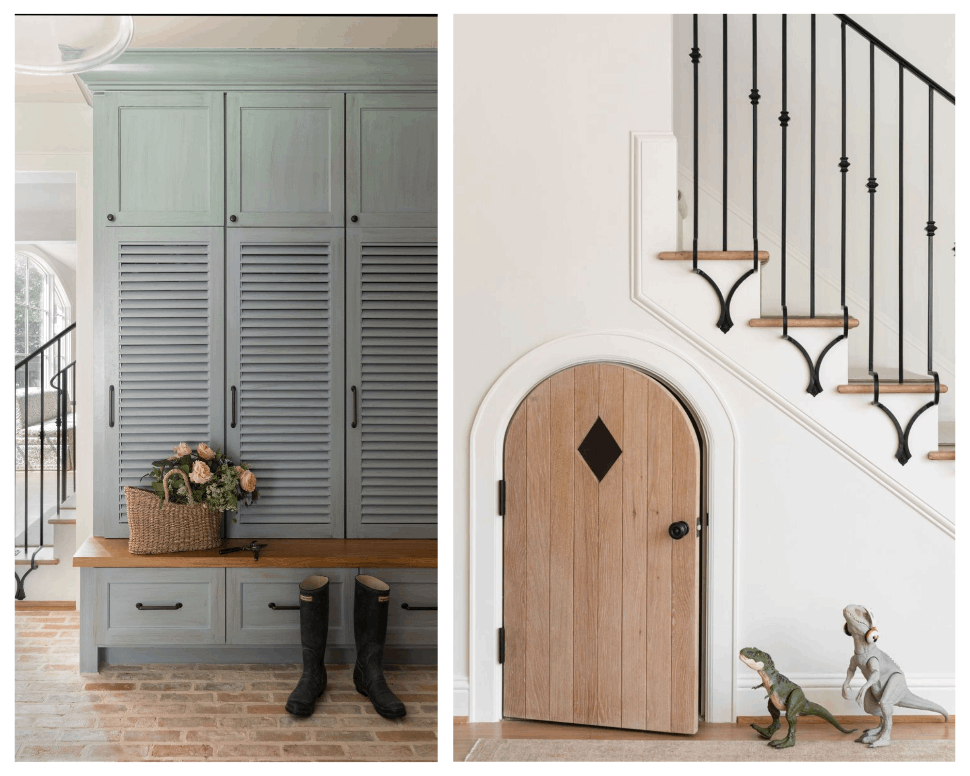
Back inside, the hallway leads to the brand-new mudroom and a charming stair nook — the latter of which we designed as a playroom for our clients’ little girl. LUDC Creative Director Gina sketched the doorway right onto the wall and our team designed this adorable door.
We converted what was originally the children’s playroom into a mudroom. Adding a mudroom helps create a natural progression from the garage to the interior. We included lockers that the LUDC team designed and added a desk for the homeowner.
From behind the stairs, we naturally head up to the second floor. The second floor addition is not visible from the front elevation — a key element that was very important to our clients. By adding the addition, we were able to rework the private wing of the home. We gave our clients a larger bathroom, a large closet and a study.
Bunk Room for the Boys
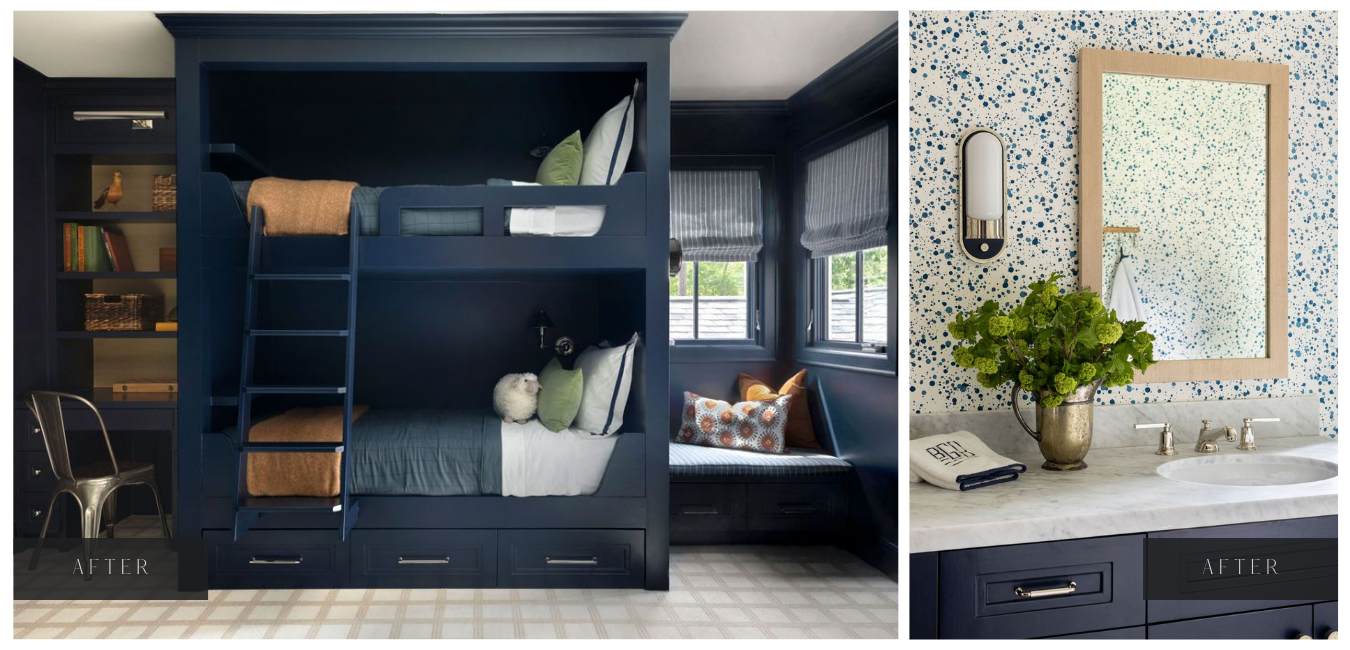
Previously upstairs sat a large unfinished room without much function for the family. We separated this space into two bedrooms and connected them with a Jack-and-Jill bathroom for the kiddos. While they now have two bedrooms, the brothers often sleepover in the bunkroom aka the “fun room.”
The added square footage sits at the rear of the home over the hunting lodge, hiding it from view of the street.
Guest Bedroom and Guest Bath
Finally, we visit the new guest accommodations just down the hall from the boys’ rooms. In the guest bedroom, we enhanced the architectural design of the room with new millwork. Our team integrated hidden storage into the paneling, allowing for convenient storage for keepsakes and seasonal décor. Our team also created a small reading nook in an alcove next to the bed, beneath one of the new dormers.
Thank you for joining us on our tour of our Hedwig Village project! We hope you enjoyed seeing the transformation of this 1920s ranch-style home into a modern family home that honors the history and charm of the property. Don’t hesitate to follow us on Instagram as we share more details.
Learn More About Our Renovation and Interior Design Services
Are you planning an addition, structural renovation or cosmetic remodel? Contact the team at Laura U Design Collective to learn more about our renovation and interior design services. We serve clients in Texas, Colorado and all across the Western US. Want to learn more? Read this post where we outline everything you need to know about home additions and structural renovations.
